
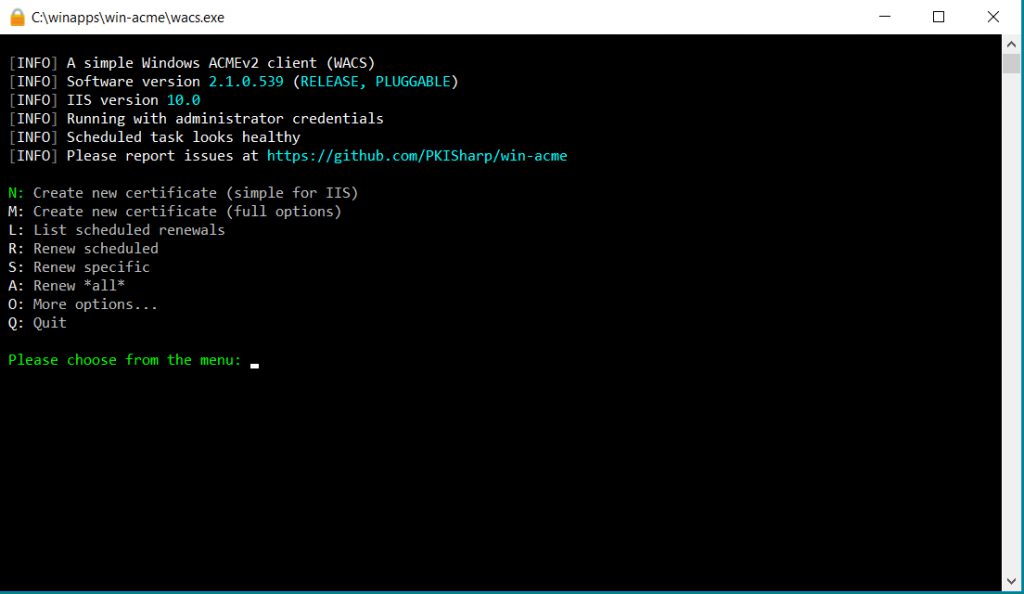
I use WinAcme to manage a free secure server for my websites. WinAcme is easy to use, works with Windows and IIS, and provides one-click free secure server features. If you haven’t used it before, I link to my write-up of it at the bottom of this page.
The challenge comes when you want to have it handle multiple subdomains. And I’m not just talking five or six, like www.aspisfun.com and course.aspisfun.com and so on. With one of my larger sites I have over 400 subdomains, one for each subtopic area.
WinAcme has a limit of 100 entries per certificate.
So how do you handle the situation when you have over 100 subdomains?
The easiest way to do it is to create a wildcard. Instead of having hundreds of individual bindings in IIS, one for each subdomain, you create one master entry such as *.bellaonline.com. That handles every single request that comes in that ends with .bellaonline.com.
But if you simply try to use the standard WinACME menu options with that setting, it’s going to complain. It won’t let you use a wildcard with the standard options. The error shown is:
[INFO] Target generated using plugin IISSites: aspisfun.com and 8 alternatives
[EROR] The default validation plugin cannot be used for this target. Most likely this is because you have included a wildcard identifier (*.example.com), which requires DNS validation. Choose another plugin from the advanced menu ('M').
[EROR] No validation plugin could be selected
OK, so now what?
USE THE MANUAL OPTION
When you run WinAcme, choose M for a manual new certificate.
Choose 4 for a manual input of the names.

Put in *.WEBSITENAME.com using your own URL or URLs of course. If you have multiple URLs, separate them with commas.
It’ll suggest a “friendly name” to show people who want information on your certificate. You can go with their default setting or you can type in something yourself. Either one is fine. If you’re doing test runs with this, use a slightly different name each time and write them down. That way you can figure out what works.
Now it’ll say:
The ACME server will need to verify that you are the owner of the domain names that you are requesting the certificate for. This happens both during initial setup and for every future renewal. There are two main methods of doing so: answering specific http requests (http-01) or create specific dns records (dns-01). For wildcard domains the latter is the only option. Various additional plugins are available from https://github.com/PKISharp/win-acme/.
1: [dns-01] Create verification records manually (auto-renew not possible)
2: [dns-01] Create verification records with acme-dns (https://github.com/joohoi/acme-dns)
3: [dns-01] Create verification records with your own script
I read up on acme-dns. I found the instructions to create your own acme-dns to be incredibly daunting. I just need this for one site. So I went with the manual records.
It now says:
After ownership of the domain(s) has been proven, we will create a Certificate Signing Request (CSR) to obtain the actual certificate. The CSR determines properties of the certificate like which (type of) key to use. If you are not sure what to pick here, RSA is the safe default.
1: Elliptic Curve key
2: RSA key
I trust them. It advises RSA, so I chose that.
Next up it says:
When we have the certificate, you can store in one or more ways to make it accessible to your applications. The Windows Certificate Store is the default location for IIS (unless you are managing a cluster of them).
1: IIS Central Certificate Store (.pfx per domain)
2: PEM encoded files (Apache, nginx, etc.)
3: Windows Certificate Store
C: Abort
I suggest just going with the Windows Certificate Store. This is already all set up for you and available.
It’ll give you the remaining two options you didn’t choose, in case you want a backup. I suggest just going with Windows Certificate store for now. So say 3 for No Additional Storage Steps Required.
Next up:
With the certificate saved to the store(s) of your choice, you may choose one or more steps to update your applications, e.g. to configure the new thumbprint, or to update bindings.
1: Create or update https bindings in IIS
2: Create or update ftps bindings in IIS
3: Start external script or program
4: Do not run any (extra) installation steps
Choose 1 to create the HTTPS bindings in IIS. It’ll ask which of your sites to bind to. Choose your main site. It’ll now ask if you want to do anything else with your binding. Choose 3 to say you’re set.
VERIFYING YOU REALLY DO OWN THIS WEBSITE
It needs to verify you actually own the website URL you’re claiming to be. So it’ll have you go to your DNS and add, then delete, a TXT record. I buy my URLs from Network Solutions so it’s very easy for me to log in there, add in the TXT record, do the verification, and delete it again. You’ll need to check with your DNS person to figure out how to do it with your DNS organization, if it’s not Network Solutions.
Note that adding a TXT record might take a few minutes to propagate out to where WinACME can see it. Be patient with this step.
Once you’ve added, then deleted, that TXT record, it asks if you want to overwrite any existing record. Say yes.
It’ll ask if you need to specify the user to run that task. You can probably say no.
And that’s it! You can Q to Quit Out!
Thank you so much to all the amazing forum members at Let’s Encrypt who helped me through this painful testing process.
Here’s where to learn about all the basics about WinACME and Let’s Encrypt.
Lots of thanks for your detailed instructions! It does saved my day.