
Web browsers work with the idea of creating a cache. The end user has a copy of a webpage on their local machine which they view. If the user goes to another page on the same site, they should be able to reuse some of the common items they have already downloaded – the site logo, the site graphics, and so on.
This is where the Entity Tag, or ETag, comes in.
An Entity Tag gives a unique ID to each item the user gets, like a site logo. That way if they go to another page and ask for that logo again, the browser knows they already have it. The browser simply redraws that same logo again instead of having to download it again.
This causes the site in general to draw more quickly, because the exact same files aren’t being re-downloaded over and over again.
Here’s how to update your Entity Tag setting in IIS. Note that before IIS7 you had to explicitly turn on Entity Tags. Once you reach IIS7 they are by default TURNED ON so you only need to go in here if you want to disable them.
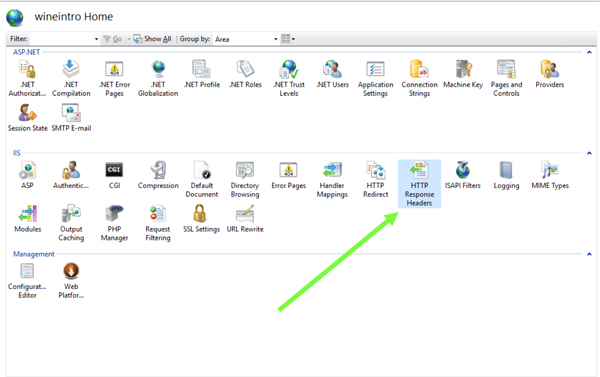
First, load up the IIS Manager on the server. On the left, navigate to the site you wish to work with.
In the main options area, choose HTTP Response Headers.
In here, to disable ETags, you would click “Add” on the right.
You would add a entry with a name of ETag and then a value of “” – i.e. two double quotes next to each other.
Doing this causes the ETags to not be sent.
If all your content is coming from one server, I recommend having ETags to be on. But if you’re running multiple servers and sometimes your images come from one server and sometimes the exact same image comes from another server, you’ll want to disable ETags. The ETags will get confused by the same image coming from multiple places.
Ask with any questions!
Leave a Reply